

My New Bambu H2S Had Unhealthy Defaults
Some links in this post are Amazon affiliate links. As an Amazon Associate I earn from qualifying purchases.
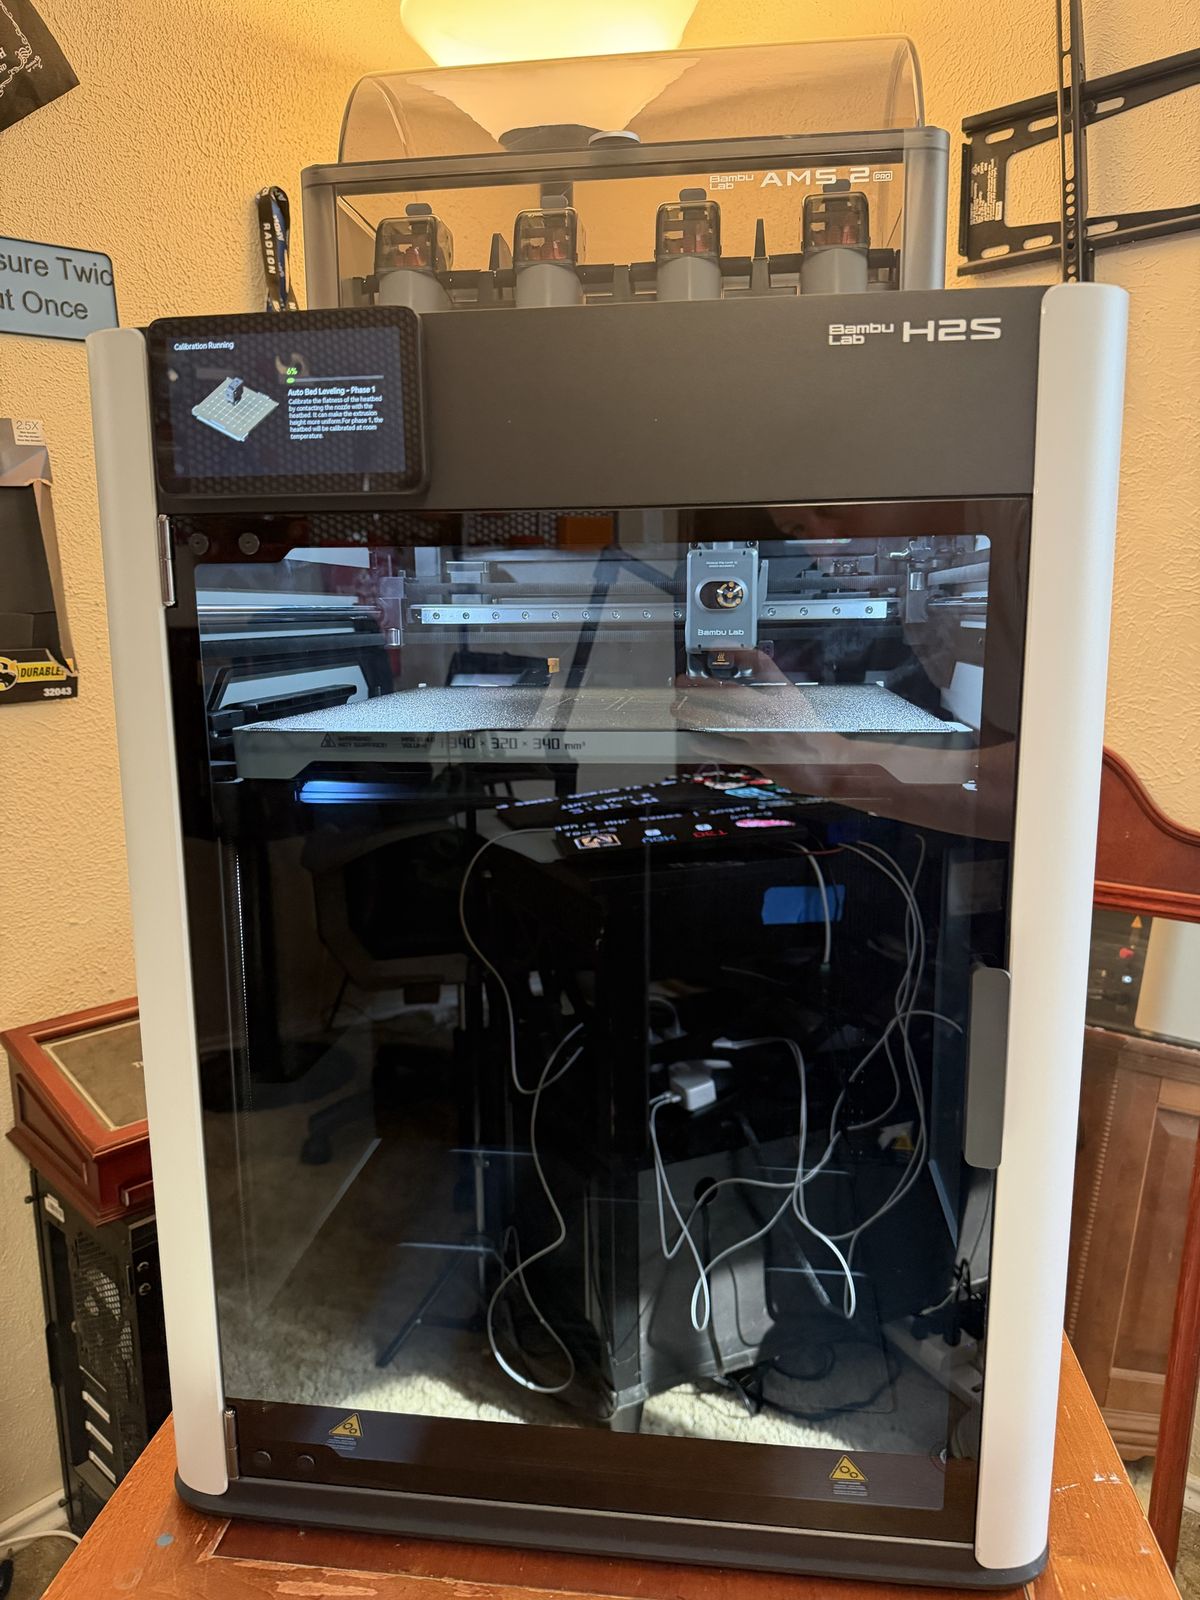
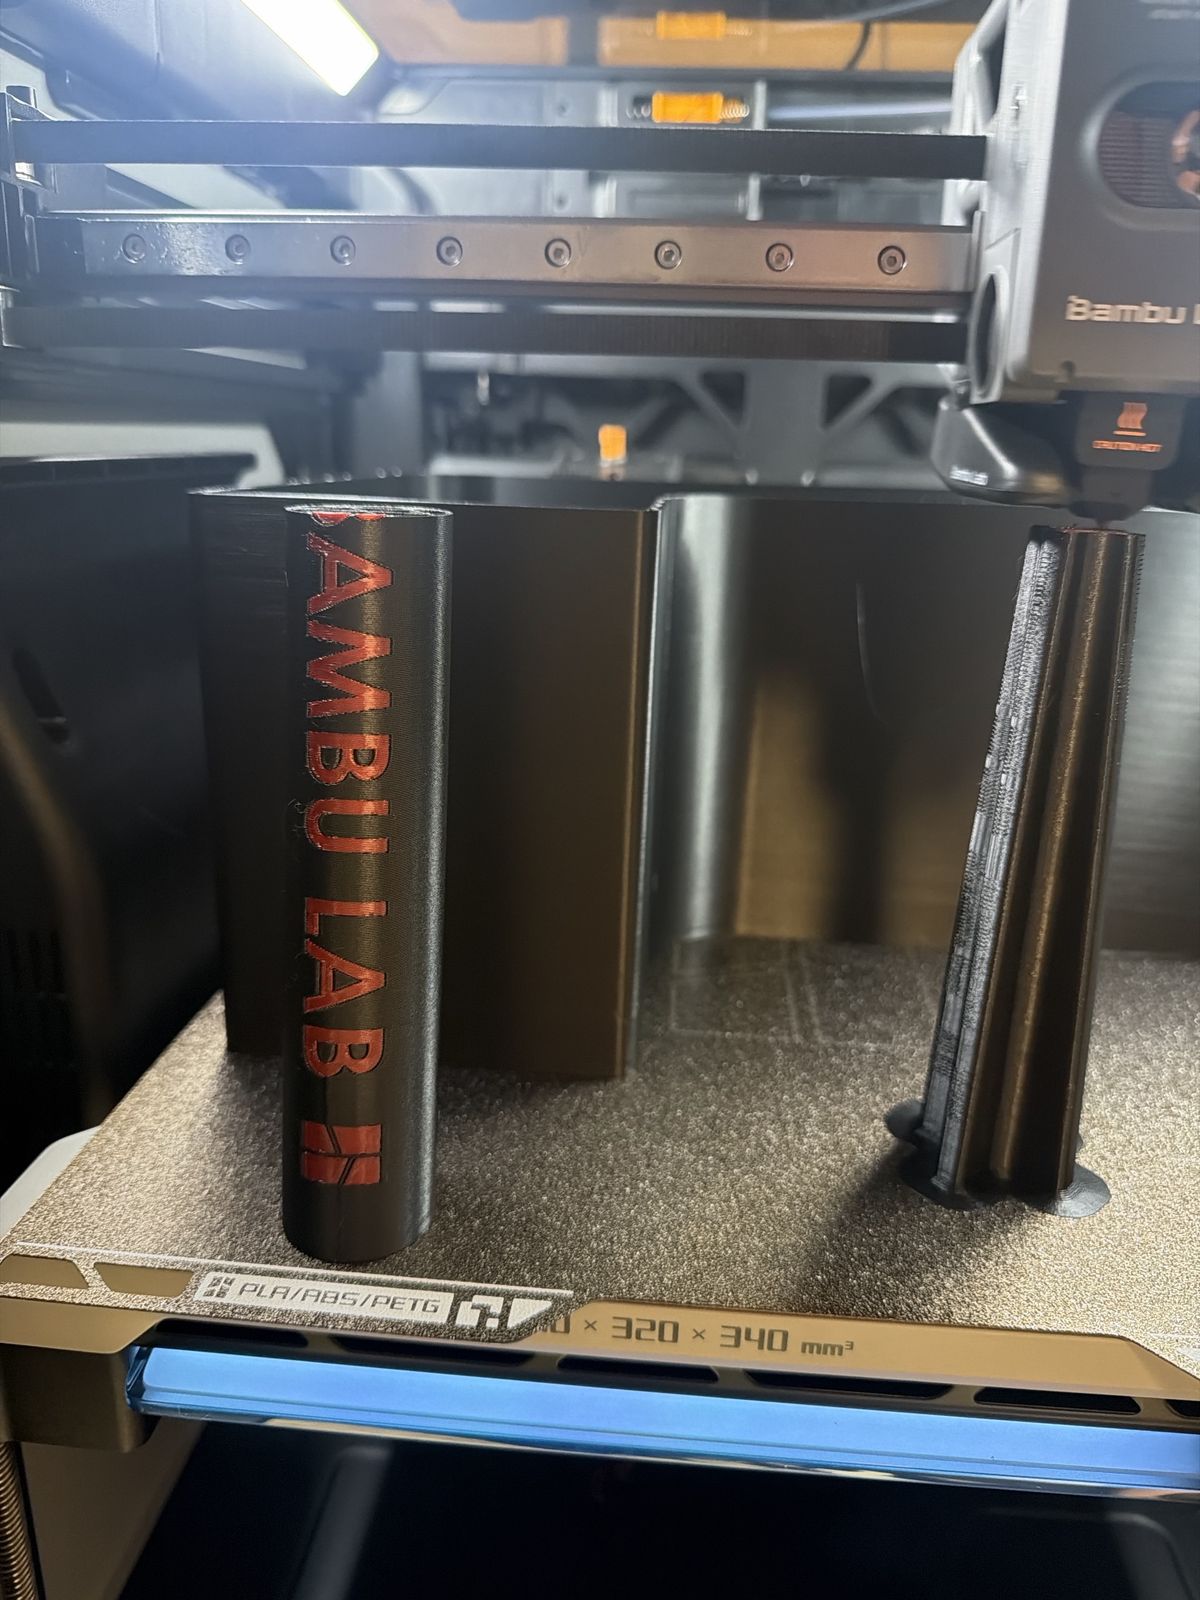
I added a Bambu H2S to the printer room next to my P1S and started a long PETG print that afternoon: a big bin to catch the purge scraps it drops out the back, with red Bambu Lab lettering on a black tube, so it swapped filament every few minutes. By the next morning the printer room air quality sensor was high enough that I opened a window, and that’s the only thing that brought it down.
That room has a Sensirion SEN55 on ESPHome. Before that print started at 4:15 PM, the room was clean: from 2 AM to 4 PM that day, every hourly average was inside the EPA’s Good range (up to 9.0), and all but one hour was between 0.5 and 2.4 µg/m³.
Once the H2S was printing Bambu PETG HF, PM2.5 started rising. The 6 PM hour averaged 11 µg/m³, and by 9 PM it was 49. From 10 PM to 5 AM every hourly average was between 57 and 63 µg/m³, with readings up to 68. On the EPA’s PM2.5 scale, anything over 55.4 is Unhealthy.
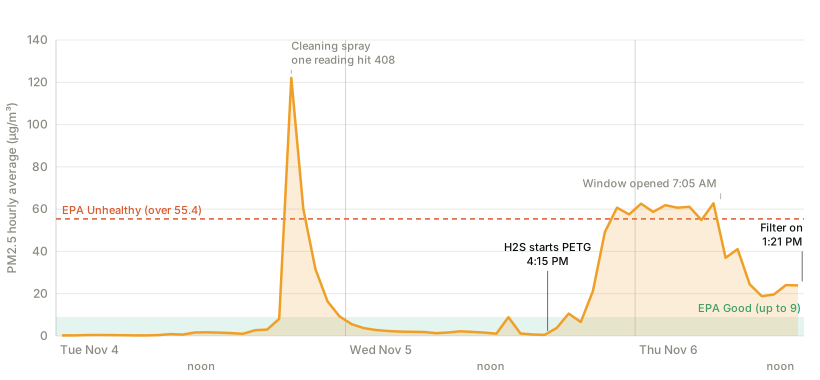
The tall spike on the left is from the evening before, when I wiped the room down with cleaning spray. One reading hit 408, but the room was back under 5 by 1 AM. The printer was different: it kept the room above the Unhealthy line all night, until I opened the window at 7:05 the next morning.
The filter was there, the air just didn’t go through it
The H2 series has a built-in carbon and HEPA filter, so my first guess was a bad filter. The real problem was the path the air takes.
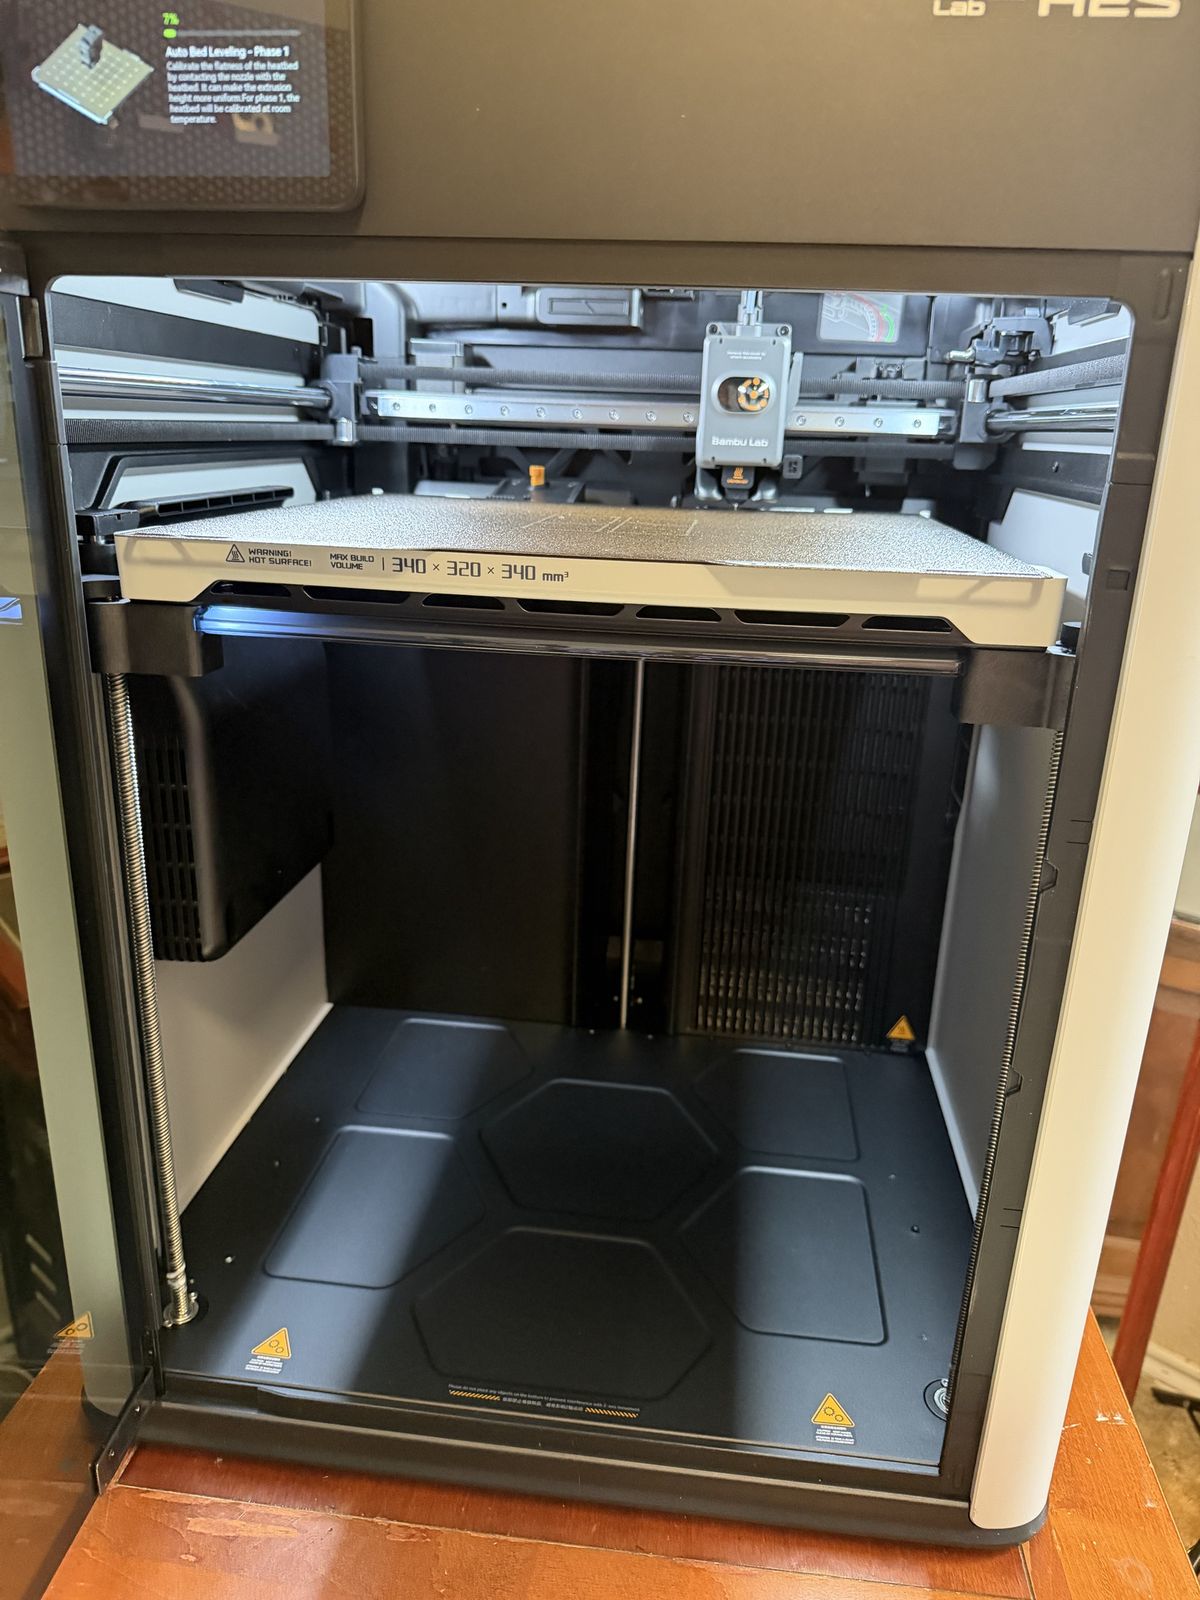
Bambu’s filter guide puts it behind a snap-on cover on the chamber’s right inside wall.
The H2 printers pick an airflow mode on their own. For high-temperature filaments like ABS and ASA they run in heating mode and recirculate the chamber air through the filter. For PLA, PETG and TPU they run in cooling mode: the top vent pulls air in, the rear grille pushes it out, and the filter is bypassed. Bambu documents this on their H2 cooling fan page.
The ha-bambulab integration exposes this as sensor.bambu_h2s_airduct_mode, and it read cooling for the entire print. So everything coming off the PETG was leaving through the back of the printer, unfiltered, straight into a closed room.
What I looked at before finding the easy fix
My first plan was a DIY one: duct the rear exhaust into a printed can holding a Levoit Core 300 filter. Before buying anything I went looking for what other H2 owners had built, and there’s a lot. I went through about 75 MakerWorld models, the Bambu forum’s long H2 filtration thread, and the commercial kits. The short version:
- The best-rated printable box was KYZ’s Angled Exhaust Filter: one print plus a gasket, two Levoit LV-H128 filters, 4.98 stars from 96 ratings, and no overheating complaints that I found.
- Vento is the most popular and the easiest to install, but it also has the most “chamber too hot” and loud fan reports on PLA and PETG.
- Running a hose to a purifier or out a window works well if you have the floor space or a window nearby.
- A room purifier alone wasn’t enough for one owner with an IQAir HealthPro. PETG still added 10 to 30 µg/m³.
The big concern with any rear filter is back-pressure. The printer’s exhaust fan has to push air through it, and small filters make the fan ramp up or trip chamber temperature warnings.
The setting I didn’t know existed
While digging through that, I found the H2S firmware release notes. Version 01.02.00.00 “added a filtering option with cooling mode for the adaptive air circulation system”, meant for exhaust on low-temperature filaments (release history). The printer stays in cooling mode, but the exhaust goes through the built-in filter on its way out.
You can turn it on two ways:
- In Bambu Studio 2.5.0.64 or newer: Printer settings, Accessory tab, Use cooling filter. That puts the command in the start of every print you slice.
- During a print, from the printer screen or the fan popup on Bambu Studio’s Device tab: the Filter toggle.
The toggle wouldn’t stay on for me at first. I’d flip it and it would turn itself back off. The print was in a filament change at the time. Once the printer was back to actually printing, it held. I’ve since seen one forum post saying it also resets during the calibration at the start of a print, so the slicer setting is the reliable way.
What Home Assistant sees when it’s on
The airduct mode sensor doesn’t change. It still says cooling, so my dashboard kept telling me the exhaust was unfiltered while it wasn’t.
Two other things do change:
- The chamber exhaust fan went from 20 to 30% to 40 to 50%. Pushing air through the filter takes more effort, so the printer runs the fan harder to hold the same chamber temperature. The chamber stayed at 34 to 35 °C, same as before.
- The printer raised an HMS notice,
HMS_0300_A700_0003_0001, saying in part that “air filtration is enabled” and it has “automatically increased exhaust fan speed”. The integration puts that code onbinary_sensor.bambu_h2s_hms_errorsas an attribute.
That notice is the only direct signal, so the dashboard reads it. If the code is in the HMS attributes, the exhaust card says the air is going through the built-in filter and the health chip says “Filter on” instead of “Error”. It isn’t perfect. The same notice also fires when the chamber is just too hot, and a Home Assistant restart cleared it on me, so the card went back to saying “unfiltered” mid-print.
The dashboard
With a second printer the old 3D Printer view didn’t make sense anymore, so I rebuilt it.
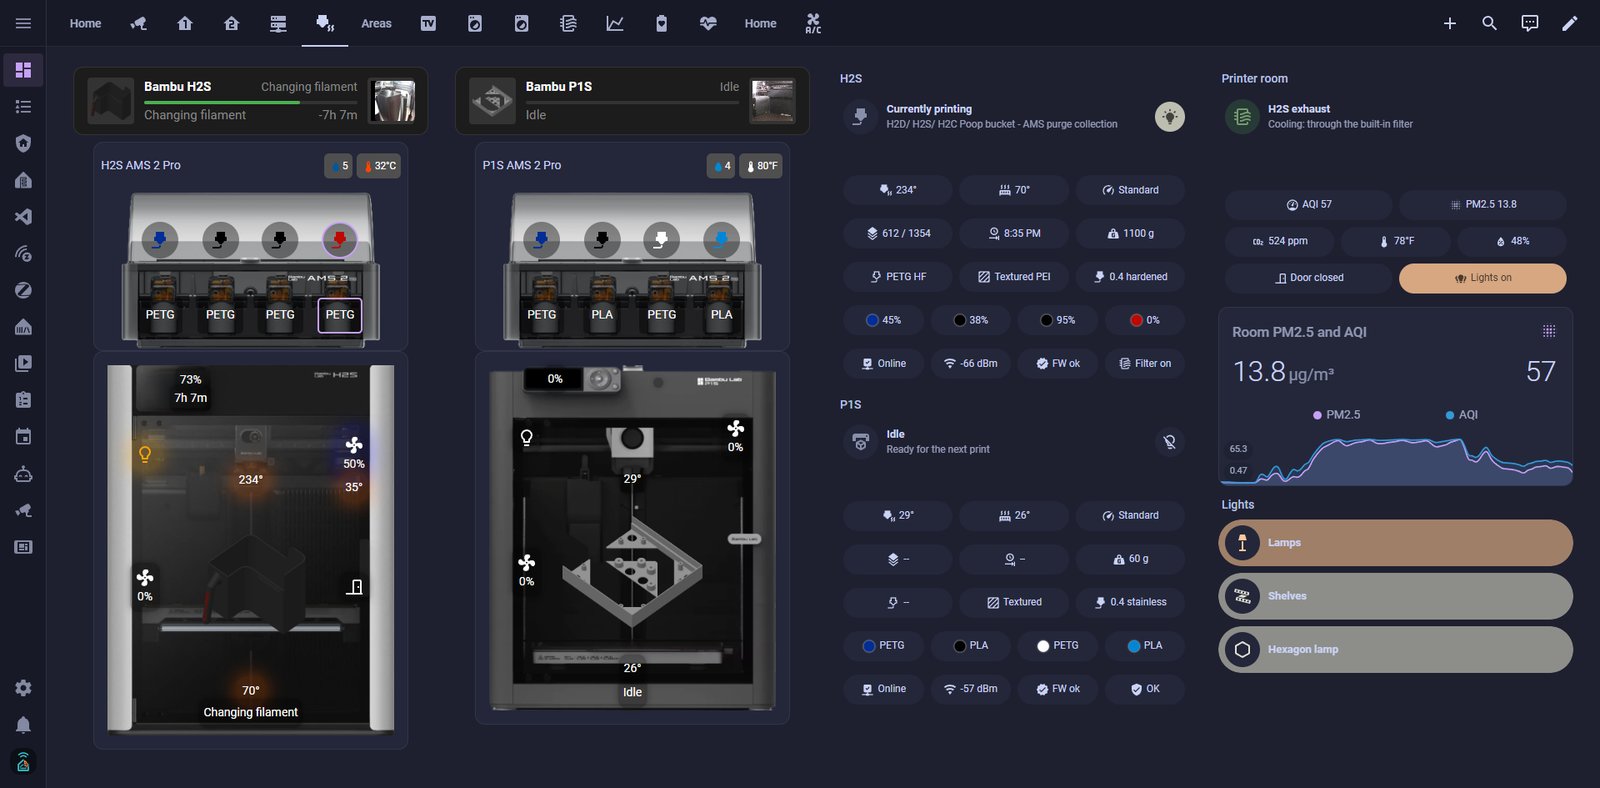
Both printers sit side by side with their AMS units on top, using the cards that ship with ha-bambulab. A third column has each printer’s current job and its chips, made with Bubble Card: temperatures, layer, finish time, filament, how much is left on each spool, and online, Wi-Fi, firmware and error status. The last column is the room: the exhaust card, AQI and PM2.5, and the lights. It all fits on one screen at 1920x1080 without scrolling, and tapping either printer’s top bar opens its camera.
Did it work?
I turned the filter on partway through this same print, at 1:21 PM. The print finishes tonight, and I’ll update this post with the numbers.
What’s left
- Check that the filter inside the printer doesn’t still have shipping plastic on it. Bambu’s unboxing guide doesn’t mention it either way.
- The fan runs about 20 points higher with the filter on, so it’s louder.
- Filter life. Bambu says to replace the H2 filter every 1440 print hours or 60 days, and running it for every PETG and PLA print will probably use it up faster.
Related posts
Building an air quality LED indicator for the AIR-1
The AIR-1 has three onboard RGB LEDs, so I made them show air quality at a glance. The feature itself is small. Getting there took longer than it should have, because I kept fixing things that weren't the problem. These are the dead ends and where it ended up.

Two days of ceiling dust, measured in eight rooms
I spent two days cutting sheetrock, disturbing old insulation, and scraping popcorn ceiling in the upstairs bathroom, with eight Apollo AIR-1 sensors watching the whole house. The two rooms off the bathroom spiked 20 to 30 times over, and the return air lifted every other room too. The room-by-room data, and why I wore a P100 the whole time.
My beginner Home Assistant class is up on YouTube
I taught my free Intro to Home Assistant class at the Dallas Makerspace on September 12, and the full recording is on YouTube now. The morning of the class I cut the live demo and taught it with the hardware in my hands instead. The outline, handout, and print files are free to reuse.